1) Jawa Sandcrawler
This one caused me a few problems. Due to its weird slopes and angles it was difficult to get the vertices in the right place. I had to use additional source material to get it as close as I could to it.
The tracks took the longest to work out the best way to do them. In the end I decided to have them as 4 pieces of outside track which will later have an animated texture. It was the first one I started to model and the last one I finished.
The inner parts were fairly straight-forward, a cylinder here and there. This was a lot easier once I figured out how to make the model transparent.... My model lacks a few details such as the windscreen and a few raised areas, but my logic is these can be later bump-mapped and textured. I may add a few details before I start texturing it.
The final model:
 |
| without polys showing |
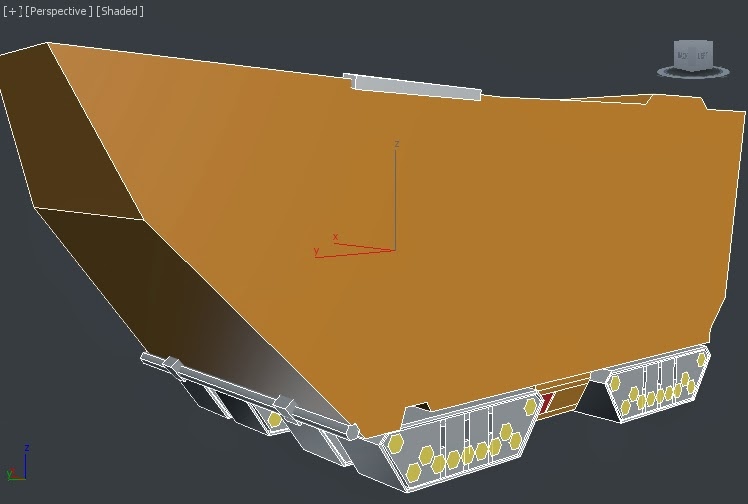 |
| With Polys showing |
2) Luke Skywalker's X-39 Landspeeder
This one is my favourite of the three, and the last one I started to model. As such, I'd learned from previous errors and made the least while modelling it..
As far as differences to the source material, i didn't include the grills on the side of the speeder, as these can be bump mapped and textured later, to keep the model at a lower poly count. My friend in the 3D Modellling course at ARU suggested this as good practice, as well as gave me some tips on how to do so.
I decided to redo the rear end of the model, changing it from rounded like the front, to angled like it is now... This was because I forgot about it while making other alterations and additions to the model.
This feature is close-ish to the original design of the speeder in the films and isn't something I originally noticed when starting to model it, hence my mistake in making the rear end rounded. I'm still not completely happy with how the wings turned out, they poke inside of the engines and they aren't as curved as I'd like them. For now, they will do though.
I could have chosen to do an open or closed cockpit for the speeder. I chose to do the open cockpit so I could add detail to the inside, as well as being able to see R2-D2 drive off into the distance when I start doing the animation, just personal taste really, though its also how you always see the speeder in the films.
The only little snag with this is the way I made the windscreen, which was to cut a sphere into a quarter and extend the vertices backwards to make the shape it is now. Because of this, the normals are reversed on the inside of the sphere, so this will look different to the outside. This isn't particularly a problem in the animation since you won't see the inside of the windscreen, but if I later use this model for something else, where you can, I may have to do something about this.
To remake the rear end of the speeder I deleted the back polygons then created a new face using the bridge tool, rotated the polygons to the right angle and added the 'housing' seen in the 2nd picture. I also extended out the rear 'fin' as I wasn't correct in where I put it my first attempt seen in the 1st picture.
The speeder body, not the engines, is mirrored, and at this point I didn't know how to attach two models together so there are a couple of points where it doesn't look quite right where the two mirrors overlap, though I tried to minimise the occurrences of these.
The final model:
 |
| Original Rear End |
 |
| New Rear End |
 |
| Speeder without polys showing |
3) R2-D2 Astromech Droid
This was a fun one to do, because it's very simple shapes, and not many of them. One thing to bear in mind next time is keeping the poly efficiency good on the cylinders and basic shapes, which is a really simple thing, but wasn't something I'd thought about previously. Once it had been changed to an editable poly, I couldn't find a way to change the number of sides/segments etc. which was annoying...
There are a few different versions of R2 on the internet, I picked a fairly simple one, because there are lots of details on the legs. I may do another version later on with more detail, but not right now. Some of the details on the head and legs can possibly be bump mapped and textured in, which will also keep the poly count low.
I didn't use an orthographic view to help scale the R2 unit, because I couldn't find one that wasn't at an angle, like most times you see R2-D2. For this reason, the feet aren't to the right scale and larger than they should be. I'll make sure to get a better source image in future.
I didn't use an orthographic view to help scale the R2 unit, because I couldn't find one that wasn't at an angle, like most times you see R2-D2. For this reason, the feet aren't to the right scale and larger than they should be. I'll make sure to get a better source image in future.
Final Model:
 |
| R2-D2 with polys |
 |
| R2-D2 without polys |
Castle Updated
So, I've done a bit more on my castle in my own time. Here's the new version, with added moat and a plane for it all to rest on.

I used the Boolean tool to add the front gate in the guardhouse, seemed the easiest way to do it. However when I tried to do the same with the inner side walls next to the keep, to create arches, it created these extra edges which didn't look nice, but it's something to do with how the algorithm for the boolean tool works. How I can fix it, I haven't figured out yet, but I plan to add more stuff to this model, some houses inside the wall, and a drawbridge for a start.
I'm undecided on whether to make the castle taller so the drawbridge will fit, as the lake is a little far from the actual doorway. I could also just build a stone bridge over the moat, and a smaller gate over the door...
To get the moat I extruded the surrounding polygons on the plane downwards, and used the 'Relax' tool to make it seem more curved and natural, it was just a blocky sort of V shape before with a flat bottom beforehand.
Useful Tools
In these models I found no use for the Lathe tool mentioned in the lectures, and I only used the Boolean tool on my castle. I imagine it's more useful on architecture than ships...
Here are a brief list of the some useful tools I discovered while working on these:
- Insert Vertex - Under the 'Edges' menu, took me a while to find it... Very handy for setting up a model to mirror it, if the edges are uneven or in a strange place.
- Bridge - Used for connecting edges together, useful if you find out a polygon is missing. This was before I found out about another tool which does it better, and with more edges selected. Bridge seems to have a limit of 2 edges...
- Mirror - Very useful if your model is symmetrical or has features which are opposite and identical to each other. I found out later on that it's possible to attach mirrored objects together into one object, funnily enough called 'Attach', a better way than trying to line up the seams between the two objects. Though you still have to collapse a few vertices on the edges of the two mirrored objects where they join, using the Attach tool is neater in my opinion.
No comments:
Post a Comment